

Last week we discussed lining up our feet under the pelvic bones which are the pointy bones in front of the pelvis. Photo below has them marked in pink dots.
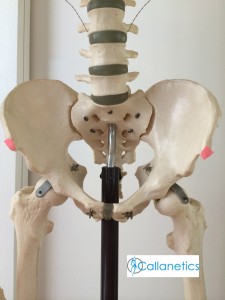
We also discussed the importance of keeping the weight on the heels rather than loading on the front of the foot.
If you didn’t get round to reading this blog here’s the link to a short easy read on the first step to lifelong whole body wellness and toned pelvic floor.
This week we’re going to add two more parts of the alignment puzzle and cover how we’re addressing pelvic floor disorder and maintaining tone.
The first thing we’re going to do to restore a healthy, toned pelvic floor is by…
1. Lining up Feet
- Stand in your regular stance and line up your feet/ankles directly under your pelvic bones as you practiced from last weeks blog.
- Now notice in which direction your feet are pointing. Are they pointing straight ahead or is one foot, or both, turned outward (duck-like). Are they turning inwards? All these positions are pretty common but having them turned right around and facing backwards isn’t so please, if this is the case, see a specialist as soon as possible …just kidding, I know they’re not…are they?
Now that you know where you are at this stage it’s time to fix your feet so go grab something you can line up the outer edges of your feet with. A sheet of paper is fine, so is a block, half dome, tile or even a straight edge picture frame with a pic of one of your favourite people.

Line the outer edge of your foot with the straight edge and, yes, you are probably feeling more than a little pigeon-toed right now.
Don’t forget you’ve got two feet so do the other one also.
So, now you’re not only feeling pidgeon toed but your knees have also probably fallen inwards towards each other. don’t panic !!!
Let’s correct this by….
Setting up to create an external rotation of the hip joints
- Standing with feet aligned under pelvic bones, feet facing forward and weight back on heels. You should be able to freely lift up your toes.
- Now, create an external, outward rotation of your legs. This should feel as though it’s initiated from within the pelvis so avoid using your quads or knees for this movement. It’s a movement that utilises the deep hip rotators and pelvic floor.
- Relax that and then repeat several times. It will feel as though you’re rolling your thighs outward and then inwards as you become familiar with the movement.

Things to pay attention to…
- Are the arches of your feel rising up as you rotate outwards? If you’re noticing this then excellent. You have made a connection with the arches of your feet and your pelvic floor. You may also feel your inner thighs fire up. Once again pelvic floor muscles in action.
- Are you rolling on the outside of your foot as you create the rotation? The stiffer your pelvic floor and hip joints the more you’ll be aware of this and it’s very common for most of us to experience this after a lifetime of walking with feet turned outwards.
- Regular, daily practice will gradually and gently release the stiffness and you’ll find in time that it will become easier to keep the joint of the big toe anchored to the ground as you create the rotation. Pelvic floor musculature will gently return back to optimal, healthy length to ensure that it serves the purpose of being able to support your organs and yield against force.
Just in case…
Avoid clenching your buttocks to create this movement. Relax your buttocks!
What you’ll also now notice is that when you externally rotate the legs you’ll find your knees will align so that they face forward.
Remember, your weight should be stacked over your ankles so lengthen down into your heels with fully extended hamstrings. Fully extended means no bent knees and also relaxed kneecaps. The external rotation will prevent hyperextension of knees.
Use your hamstrings to straighten your legs, not your quads
Our approach in The Callanetics Studio is to address whole body alignment to correct pelvic floor disorder rather than work directly with the pelvic floor muscles.
By aligning our feet, hips, pelvic bones and ribcage, with weight stacked over ankles, we are toning the pelvic floor and reversing ageing. These alignment principles return your muscles to optimal length for full health and body shaping benefits.
The alignment principles you will learn in all our videos are not just for when you’re doing your workout but to be applied to your day to day activities.
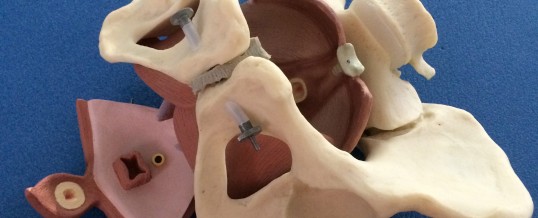
So, if you want to avoid this (see pic below) happening to your pelvic floor start by checking in during the next few days which direction your feet are facing. Stand with them facing forward and walk with them facing forward and your good to go 🙂

Happy pulsing and look out in your inbox next week for another piece in the alignment puzzle enabling you to feel and look ten years younger.
Which direction are your feet facing right now, let us know in comments below?.
AUG


About the Author:
Co-founder of The Callanetics Studio and owner/operator of Gold Coast Callanetics, Queensland. Sandra has been a Callanetics Instructor since 2001 certifying in Chicago, Illinois. Sandra is the Lead Instructor in Callanetics Evolution DVD.